We all know, I am a process kind of person. I like to think through how something is going to work, looking at all of the variables and changing things around until I have things just like I want it to be.
And then sometimes I just throw caution to the wind and break all the rules.
But this was not supposed to be one of those times. This was a time when everything was supposed to be just as I had envisioned it.
I should have known.
So, yesterday I picked up the Thanksgiving turkey. It is the last piece of our poultry CSA, the crown jewel if you will. On Sunday it was happy in the field. On Monday it had given it's life for our carnivorous pleasure. On Tuesday afternoon I picked it up, all ready to be brined and then cooked and consumed. I can tell you that if it weren't a part of the CSA then I might think.....about a thousand times.......before buying a turkey that at "retail" costs around $100.
Yes, I said $100. It had better be one damn fine turkey (oops, sorry).
I had taken the time on Tuesday to make my turkey brine, so that today I would be all ready to get the process started. I had my brining bags at the ready, well really just turkey roasting bags cuz I couldn't find anything else at the grocery store to fit the bill so I had to McGyver it.....and not for the last time in this turkeysaga. I had my possibly food safe (or not) plastic bucket that the turkey in the bag and enrobed in brine would rest while being kept at the perfect chill in the basement refrigerator.
All was in readiness.
We went shopping this morning to get the "last minute things" that we had forgotten. I had already been to the grocery store twice in the past four days and spent an entire month's worth of income....and we still didn't have everything. After getting home and putting stuff away and running the dishwasher and making various other things, I was ready to start the turkey brining.
I got the bucket and put in the double bagging for the brine. Belt AND suspenders is what I always say. I washed the turkey and gently, or not, put him, or her, into the bags in the bucket. I had to wrestle the thing a bit as one of the bags got stuck under the turkey and there was a moment of mutterings and imprecations under my breath but I soon had everything set up correctly.
I poured in the brine......and the train came off the rails. Not sure what I was thinking but I had not made enough brine. Not by a long shot. I was going to need, by my rough estimate, at least double the amount of brine that I had made. I had more brine fixin' stuff in the frig so got to going on that and finally had a sufficient amount....sort of....to work. Big sigh of relief. I closed up the bags and hauled the turkey in bag in bucket to the basement.....
Where the derailment got worse.
I had cleared out the bottom part of the basement frig to accommodate the turkey, intending to take out the bottom shelf to make room. Only I found that I couldn't remove the bottom shelf. Evidently this is something that I did not know about my basement refrigerator. No matter how I moved the shelf and shook it and muttered at it,,,,,it would not be moved.
Hmmmmmmm.
OK, go to plan B. I dug out the big cooler from the basement, took it up to the garage, and then had Slim Jim carry the turkey in brine bag in bucket up to the garage for me. Plan B was to take the turkey in the brine bag out of the bucket and transfer it to the cooler, cover the cooler with blankets and keep it in the cool garage until tomorrow. I lifted up the turkey in the brine bag from the bucket and that is when Plan B spun off into space like Darth Vader's fighter. Evidently, while I was farting around with figuring out Plan B, I hadn't realized that a bit of the brine, which is sticky because of the juice in it, had gotten out of it's brine bag containment field, dripped down to the bottom of the bucket and cemented the bag to the bucket. I lifted the turkey in the brine bag out of the bucket....and tore a small hole in the bottom of BOTH bags. Not a big hole but a hole is never good, whether in a space or in a brine bag.
So we moved on to Plan C which was just to put the turkey in the brine bags in a garbage bag into the cooler and go and have a drink. However, I realized quickly that the brine would just leak out of the bags and into the garbage bag and be absolutely no good to the turkey, which was the entire intent of the brine in the first place.
Cue Plan D. Plan D was just put the turkey into the dubiously food safe, but clean, bucket, pour in the brine, put the turkey in the brine in the bucket into the cooler, go have a good cry...and a drink.
Except that the bucket did fit into the cooler....but I couldn't close the top.
Shit.
But then I remembered I have a smaller cooler in the basement. I figured I could just turn that one over onto the top of the turkey in the brine in the bucket in the cooler and make a bigger, bastardized cooler of dubious parentage. Yeah, THAT will work....or not. It so didn't work.
Mother of all that is HOLY!
OK. I can figure this out. The bucket fits in the cooler, just sticks up a bit. I can cover it with some newspaper, then blankets and it will be insulated enough, maybe.But the specter of salmonella poisoning and unrestrained vomiting raised it's head and then I decided that it might be better to get some ice to go around the turkey in the brine in the bucket in the cooler, just to be safe. That necessitated getting in the car and driving to the store, the store where everyone else was doing their last minute Thanksgiving shopping. I couldn't even find a parking space. So, I had to drive across the street to the other store and buy ice. All I wanted to do was walk in, grab a cart, walk to my right, open the ice bags case and grab some. So easy and yet, so difficult as I had to maneuver around all the other people with gigantic carts full of Thanksgiving necessities.
I JUST WANT THREE BAGS OF ICE GET OUT OF MY WAY!!!!
Back in the car. Back home. Now the turkey in the brine in the bucket in the cooler has ice around it and all is well.
Except that I decided that it might be better to actually take the turkey in the brine in the bucket in the cooler surrounded by ice and covered with blankets and put the whole thing out on the back patio where it was actually cooler than in the garage. So that is what Slim Jim and I did. I have a timer set to remind me to take the turkey in the brine in the bucket in the cooler surrounded by ice and covered with blankets and move it back into the garage about 9pm so that some marauding animal doesn't help it's to the turkey during the night.
Like I said, this had better be one damn fine turkey.

Showing posts with label Cooking. Show all posts
Showing posts with label Cooking. Show all posts
Wednesday, November 25, 2015


Thursday, September 12, 2013
Chunky Apple Crack Goodness

Last Saturday HHBL mentioned that on his bike ride he had seen a sign for an orchard selling apples and peaches. He said, “It’s was on Valley Parkway”. I swear that is what I heard him say.
Valley Parkway.
That seemed sort of strange to me because Valley Parkway is actually one of the roads that winds through the Cleveland Metropark System. Usually there aren’t any businesses on that road, just parkland. But there are always exceptions to things so yesterday, when it was 92F outside, I set out to find the orchard. I didn’t have a name. But I had “Valley Parkway” in my head and Valley Parkway isn’t all that far away from me. So I got in Coco and I drove……
And I drove……
And I drove…..Looking all the time for a sign that indicated that there was a orchard selling apples and peaches.
Nothing. Nada. Zero. Zilch.
About the time that I decided that I wasn’t going to find this elusive orchard I also discovered that I had driven all the way to PARMA. That is on the West side for those not familiar with Cleveland landscape. It is a foreign country. The land of perogi’s. I wasn’t sure if I didn’t need a passport to be there. So I turned around and headed back to my new home country, The South Side. I didn’t even know that Cleveland had a South side. I think maybe that is a myth and that Brecksville is really just like Switzerland, neutral.
But I digress.
I had a meeting that I had to go to so I scooted over there and when it was done that darn orchard was still on my mind. HHBL said he say the sign and he is good with those things. But the elusive orchard definitely wasn’t on Valley Parkway. And then it occurred to me…..
I have a smart phone. And I know how to google. Imagine my surprise to find that there were actually TWO orchards, about a half mile from each other. But NOT on Valley Parkway. But near Valley Parkway so that counts. I got back in Coco and retraced my steps and BINGO!
I stopped at the first orchard, where they do not have apple picking. But they did have several pecks of apples of varieties that I had never encountered. So I bought a peck EACH of Ozark and Prima.
I KNOW!! A peck EACH. I am crazy. But I wanted to make applesauce you see. We are out of applesauce and the stuff from last year was SO good. It was a quick purchase and I was back out on the road. Really, I didn’t need any more apples but I wanted to see if I could find the other orchard and there it was, a scant half mile further down the road.
Heavenly Hill Farm. Just the name made me happy. I was just sort of standing there, thinking about grabbing a bag of Honey Crisp apples, when the woman manning the register told me that I could pick my own apples.
Pick my own. This is something that I had never done. Amazing I know but true. And pick your own apples were 83 cents a pound. AND if you wanted “drops” you could buy those for much less than that. She said that people buy the drops to feed the deer. I don’t think she saw the look that I gave her. People buy apples to FEED the deer?? Are they crazy. I really had no business even thing about picking apples, especially on a day when it was FREAKING HOT. I had two pecks on apples already in the car.
Oh you know I did. Let’s not drag this out. I picked apples. I picked a BUNCH of apples. I would guess it was a peck of picked and a peck of drops. The drops all went into the applesauce, the picked are in the basement refrigerator for eating and who knows what else. Macintosh and Gala they are. And I cored, peeled and chopped twenty four POUNDS of apples yesterday for applesauce. I threw the aforementioned apples into my roaster, added water, cinnamon sticks, sugar and lemon juice. Partially cooked it last night and finished it up this morning. And then canned it. I ended up with 13 pints of applesauce plus a bunch of small containers that I froze for HHBL’s lunches. I did have one jar break in the water bath. It happens.
And before you send me emails telling me that I shouldn’t water bath can applesauce….
If Ball Canning tells me that I can then I can.
Guys this stuff is chunky apple crack goodness.
Wednesday, June 26, 2013
A Cautionary Tale
The ending to this cautionary canning/preserving/jam making tale is still in process. But the MORAL of the story is….
Make sure that when you freeze fruits and vegetables you clearly mark what is in the bag.
Clearly.
Because small beets and pitted cherries look very, very similar when frozen.
Yes they do.
Come with me children as I tell you a story that hopefully has a happy ending. Hopefully.
Remember yesterday when I told you all about the 17 POUNDS of strawberries I picked in my fresh fruit over exuberance and in the mistaken thought that I was almost out of strawberries from last year.
Well, since I had SO MANY strawberries still in the freezer I decided to make Strawberry Fruit Leather. Guys this stuff turned out so intensely amazingly good. HHBL and I ate an entire tray of the stuff last night…before dinner. So today I decided that I would branch out and make Mixed Fruit Leather using the same basic process. This post is not about that fruit leather.
Although if you want to know how I made the fruit leather the process is here: Fruit Leather.
No, my almost possible perhaps averted disaster has to deal with the fact that I decided today to also whip up a batch of Strawberry Cherry Jam. Those darn extra bags of last year’s strawberries must be taken care of. AND I am going to be picking cherries tomorrow hopefully so the cherries that I had frozen in the freezer (Captain Obvious here, of course they are in the freezer if they are FROZEN!) had to go as well.
So I pulled everything out to weigh and measure. Hmmmmmmm, the recipe calls for 1 pound of strawberries (Check!) and FOUR pounds of cherries (not so check). I could only find one pound of cherries. But no worries I thought, I will just reverse the amounts and it will just be more strawberry than cherry. As long as the sugar to pectin ratio is good then it is all good. I measured everything out and set it all out in bowls on the counter to thaw a bit and went back to getting the fruit leather started.
And then I made a mistake.
I was rummaging around in my big freezer, which after the last two days I think we can all agree needs to be reorganized, and I came across two freezer bags full of cherries that I didn’t know I had. One was clearly labeled cherries and the other was not but sure looked like cherries. So I weighed both the bags, took out the same amount of strawberries from the strawberry bowl and added the cherries to the cherry bowl. But I didn’t look at all those cherries all that closely. I just assumed….
And you know what happens when you assume.
You can sometimes do something monumentally stupid and very unappealing jam wise.
I was sort of in “fruit leather/jam making limbo for a bit with the fruit leather slurry not quite cool enough to process and the fruit for the jam still too frozen to work with so I decided to wash out all the freezer bags that had piled up in the sink.
Yes, I wash and reuse freezer bags. It just urks me to throw them out after one use. But I am thanking my ever loving stars and garters that I do because washing out the bags clued me in to something. Something bad.
I am happily washing and rinsing out the bags when I come across one that obviously held cherries if the deep red juice in the bag was any indication. It looked more dark red than I had thought it should be but I didn’t really look too close. However, I didn’t want to dump that juice into my wash water so I dumped it into the garbage disposal sink and then started to wash out the bag. And that was when I got a wiff.
Not a wiff of cherries….
A wiff of beets.
Beets? Why does the bag smell like beets? I didn’t take any of the beets out…of….the…..
Oh dear.
Well, that wasn’t REALLY what I said but I will spare you the details on my language at that moment. Let’s just say that Max retreated to his house in fear and leave it at that.
And that was why I then spent several minutes digging through the strawberry/cherry/beet/sugar mixture to try and pick out all of the small beets that will mixed all through the fruit and covered with sugar.
And I am SURE hoping that I have picked all of them out.
Because those darn things are the EXACT same color as Bing Cherries.
So when you are freezing beets and cherries this year just remember to label all the packages. And if you say to yourself that surely you will remember which is which when you want one or the other….
Come back here and read this post and remind yourself that you won’t know.
Because beets and Bing cherries are twins separated at birth in similar bags in the freezer.
Thursday, May 23, 2013
The Greater Garlic Internet Lied to Me
The other day, Tuesday to be exact, LaurenLeap handed me a small burlap bag with a number of heads of garlic contained therein. It was the remainder of the garlic that she had ordered to plant in the garden.
She asked me how I stored my garlic and I told her - in an old piece of pantyhose, knotted at one end and hanging in the pantry where it is nice and cool and dry. No problems. She commented that this particular garlic that she was kindly handing me stunk too strongly too do that.
At first I didn’t believe her.
But she was very right. By the time I drove home from the garden Coco smelled like she had been sitting in the middle of a field of garlic.

Well THIS stuff certainly wasn’t going to be sitting in the pantry for very long. An hour might have been more than I could take.
But what to do with all that garlic? You know I hate to waste anything if I can help it.
Well anything other than liver which should be immediately disposed of in a biohazard bag.
But I digress.
First things first was to figure out how to peel all those cloves of garlic without having my hands smell permanently pungent.

Despite the sheer beauty of this method that Saveur assured me would be foolproof…….
It did not work.
And believe me I tried. But it might have been because I don’t actually own two large metal bowls. Oh I own bowls alright. Lots of them. But they are almost all ceramic mixing bowls of very ancient age, not metal ones. I had the brilliant idea of getting out my metal roasting pan and lid and doing it that way.
Not so good.
All I succeeded in doing was making a great deal of garlic skin chaff that floated around the kitchen for a bit and made me sneeze.

There they sat, still in their skins, mocking me with their little garlicky voices.
SO I did what I normally do. I laid those cloves out on the cutting board and gave them a good whack with the bottom of the metal bowl. They gave up their skins pretty darn quick after that.
But then the issue was what to DO with the cloves now that I had them. Peeled cloves of garlic will last for a bit in the refrigerator but not forever. Do not be fooled if you buy your garlic in vast quantities from CostCo and it lasts forever in the frig.
They treat it with something so that it will last beyond the Zombie Apocalypse.
It is also not good to store garlic in oil either on your counter or in the frig. Not unless you want a really nice case of botulism.
What to do. What to do.
The INTERNET! The internet told me that if I chopped the garlic in my food processor and then added a literal boat load of olive oil and then put all of it into the freezer that it wouldn’t freeze solid. The internet assured me that olive oil doesn’t freeze solid and that when I needed a bit of that garlic I could scoop it out of the container and cook with it.

The internet had the audacity to lie to me! I can tell you that the container of garlic and oil that I pulled out of the freezer this afternoon is a solid block of garlic and oil. There will be no scooping involved unless I use a jackhammer.
So I am just going to thaw the whole thing and somehow figure out how to freeze it in small portions that can be pulled out and used.
I still cannot believe that the internet lied to me!
The internet NEVER lies.
Did you know that Elvis is living in NYC! The internet told me so and I obviously believe EVERYTHING that the internet tells me.
Tuesday, April 16, 2013
Pimento Cheese–You Know You Need It
I had a breezy Monday kind of post for yesterday….but it just didn’t seem to be the time to post it after all the news coming out of Boston. I will save it for later.
And today it is warm and rainy and I felt the need for something comforting for lunch.
Pimento Cheese sandwich!!! I am not sure why that popped up in my head but once it was there then I had to act on it. And I took a couple of pictures.
But I have to warn you beforehand that they aren’t my best work….I was hurrying…I was hungry. It happens.
My love of Pimento Cheese has been life long. The Mimi used to make sandwiches with pimento cheese spread that came in these little glass jars. Once you were done with the cheese spread the glass jars could be used as little glasses. I still have a bunch of them and use them every day.
But I digress.
Then there was the Pimento Cheese sandwiches that we could get from the cafeteria at Baylor Univ Hospital when I was in nursing school.
The angels sang when I bit into one. It had NOTHING to do with the fact that Baylor is the largest Southern Baptist university in the world.
But Mimi isn’t here at the moment and I am a LONG way from BUNS! so I had to make my own.
I am so sorry but……
But……
I don’t have any measurements for you.
Hmmmm, I think that is LaurenLeap yelling at me from 300 feet down the road. Don’t worry, I will get around to it eventually. But for the rest of you I will just tell you what I do. You can take it from there.

How hard can a recipe be that has so few ingredients? Don’t answer that! I forgot to put the bottle of Worcestershire sauce in the pictures. Oops.

Grated cheddar cheese goes into my awesome purple bowl made by my sister in law (the NYC one). I like small pieces of cheese and this was a small batch so I just took my kitchen shears and cut it up a bit more.

Add chopped up roasted red peppers, the ones that I canned last fall. You chop up however many pieces that you want and dump them in with the cheese.
Oh the color!!

Put in a dollop of mayo.
Um Deb, that looks like more than a dollop of mayo..
You would be right. I was mayo happy and so I ended up having to grate a bit more cheese to fix the mayo/cheese ratio. Then I added a few drops of Worcestershire sauce, not too much! Then applied a thorough mix.

I’m thowee, I wath hungwee and I couldenth wait.
Thursday, September 27, 2012
Dang Creativity
Sometimes creativity overtakes me. My brain goes,
HEY this would be a FABULOUS idea dontcha think?
And I listen….when I shouldn’t.
Yesterday was one of those days.

I had a boat load of apples that needed to be used up. They had been in the refrigerator for a long time.
A. Long. Time. Most likely all summer.
Have you ever noticed that summer really isn’t a time to eat apples. The apple urge just isn’t there. You have strawberries and peaches and plums and raspberries and watermelon and rhubarb to eat. Apples just don’t make the cut.
What? Rhubarb is a fruit. It goes in pies and coffee cake and muffins. And you have to use A LOT of sugar with it. What’s not to like?
Where was I?
Oh, apples. So I had a bunch of sadly soft and slightly shriveled apples (You know, there is some kind of dirty joke in that but I will just leave it there). And I was stuck home all day waiting for the Windstream cable guy.
Yes Mrs. Quigg, we will be there sometime between the hours of 8a and 5p.
Really? REALLY? No I don’t have anything else that I needed to do. And he didn’t even need to come into the house. Fiddle with the cable at the street. Fiddle with the cable by the house. 10 minutes work and he was gone. Bitter? Do I seem bitter about this?
Did I digress again? Apples. We are talking about apples. Keep on track.
And as I looked at the sadly shriveled and slightly unappealing orbs I pondered what I might do with them.
Dehydrate them? No, I already had a second load in the dehydrator.
Carve them into shrunken apple heads? I don’t have THAT much time in my life.
Apple sauce? Only enough to make one bowlful.
I know!! I will make apple tarts. That should be easy…..famous last words.
Made a batch of pie dough. Peeled, cored and chopped the apples. Added all the ingredients to the apples. Rolled out the pie dough and cut it into rounds. Spoon the apples onto the dough.
And then everything went to heck in a handbasket because I hadn’t really thought this through. I went with my not inconsiderable gut. I use an oil pie crust dough. It is FABULOUS but…..it isn’t as sturdy as a pie dough made with Crisco or lard. Everything was fine until I went to fold the dough over.
Fold dough over. Dang it a hole! Patch hole. Where did THIS hole come from.
NONONONONONONONO the dough is breaking. Rats. Rats. Double rats.
And after some shouting and gesturing I scrapped the apples back in the bowl, threw away a portion of the soggy dough, used a small baking dish that I brought back from Mexico to make a small pie, and laid the salvageable pieces of dough onto a pan to cook. I figured that they would still be good as a snack. And they would have been……
If I hadn’t decided to go and complete a task on the computer and in the process forgetting that I had delicate pie dough baking in the oven.
What is that funny smell? Something is burning? Something is…….
NOOOOOOOOOOOOOOO.
Yes.
But the pie turned out OK. I had half last night and half for breakfast. So it wasn’t a total loss.
Dang creativity.
Tuesday, September 25, 2012
It Feels So Dry in Here
Sometimes I just shake my head at the things that make me happy.
A walk on the beach with HHBL.
A new lens for the Beast.
The hush of the street after a heavy snowfall.
A liverwurst and sweet pickle sandwich with mayo on toasted bread.
A new dehydrator.

It’s here! It’s here! It’s here!!
I had been checking Amazon for days. Tracking the package. Waiting impatiently. And then today a fellow driving a white van pulled up in the driveway of Chez Knit and handed me a large box with that familiar and always thrilling Amazon logo. He also handed me a smaller box that contains the replacement router for Windstream since Fed Ex delivered the first one on Friday, put it on the ground in front of the garage door…IN THE DARK….and HHBL ran over it with the car when he got home.
But that is another story. Now back to where I was going in the first place. Where was that?
Oh yes…….
Squeeeeeeeeeee!
I will say right off the bat that I have wanted one of these for a long, long time. I cannot explain why that is, just that it is. It is one of those unexplainable mysteries of life. Like what God made liver.
I had a dehydrator years ago that was not good at all. It had come to me from someone else and I am not sure where they had gotten it. It was, shall we say, ineffective. And that is an understatement. It had a strange heating coil that was located at the bottom of the dehydrator (not a good place) and it didn’t have a fan of any kind. Nor did it have any way to regulate the temperature of the air being heated and circulated. Suffice to say that it didn’t do a very efficient job of dehydrating anything….and it took a really long time to not do the job.
Are they done? No…..next day….Are they done? No………
Not all that energy efficient.
But now I have this beauty.

Temperature control!
And I also got several trays that I can use to make fruit leathers. I can hardly wait!!

Right now I am testing it out with apples. They are supposed to be done in 4-7 hours.
Pretty soon……BEEF JERKY!
But no Salmon Jerky because it just stinks up the house and the surrounding woods.
Oh the possibilities are endless.
It doesn’t seem to take much to make me happy.
Monday, February 13, 2012
A Dollop of Sunshine in a Day Full of Blizzard
Here in the Frozen Northeast Ohio we do not grow oranges.
That means that oranges are expensive. And if you buy them you want them to taste all good and yummy. Not sour and unpleasant. So I was mighty upset when the oranges that I purchased several weeks ago where not, shall we say, all that tasty. HHBL was unimpressed.
Well darn it! Now I have 8 oranges that are going to sit in the refrigerator until they finally go rotten and have to be fished out, all dripping and slimy, and thrown in the compost pile.
Not so fast young Padwan. There is something that you can do with oranges.
You can make Orange Marmalade.
Oh just the thought brings joy and sunshine.
Lets see how we do this shall we? I will tell you right off the bat that I used Alton Brown’s Orange Marmalade recipe. No need to reinvent the wheel on this.

These are all the things that you are going to need. Don’t you love recipes that don’t require a vast assortment of ingredients and tools.
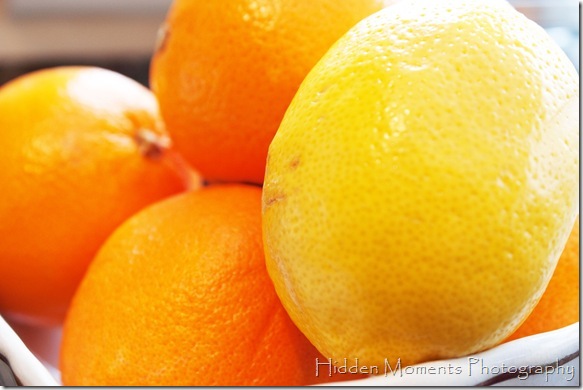
Oh oranges why must you look so lovely on the outside and yet be so disappointing.
The first thing that you are going to need to do is thoroughly wash and dry the fruit. I didn’t think that a picture of that step was required.
Then get out your mandoline and start slicing.
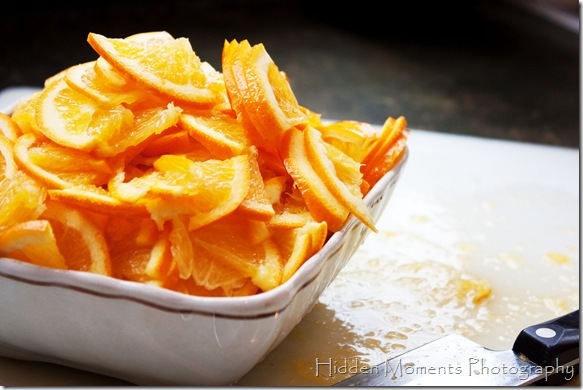
Or in this case, abandon the mandoline that refused to slice accurately and just get out a nice sharp knife. The slices should be 1/8 of an inch thick. Or so. Hey, uniformity is so boring!

Good thing they were on the sour side cuz I would just have munched away on these babies.
Then you need to zest and juice one lemon and throw that into the pot along with the orange slices.
BWAHAHAHAHAHAHAHA
Sorry.
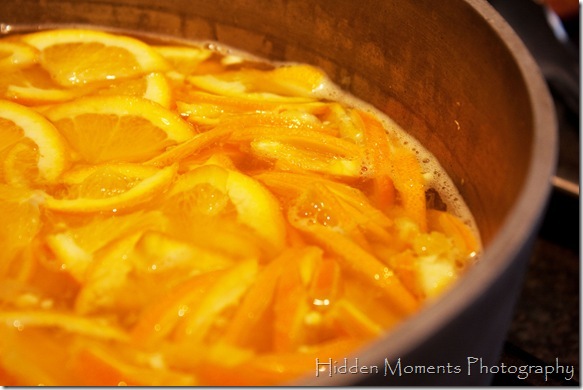
Add the oranges slices, the lemon zest and juice and 6 cups of water to the pot and turn the heat UP so that the liquid gets to a boil. Then turn the heat down a bit to keep the mix at a vigorous simmer and let it go for about 40 minutes, stirring every 10 minutes or so.
Take a break. Look out the window.

This is what it was doing the day that I made the marmalade. See, I really needed some sort of sunshine and happiness.

Stir the pot. Watch the Pileated Woodpecker. Stir the pot. Watch the Pileated Woodpecker.
And finally, after 40 minutes the oranges are all nice and soft and mushy. And that is when you add the sugar…….3 POUNDS plus 12 ounces of sugar.
I didn’t take a picture of that. I think you can figure out how to do that. But I will tell you that you need to make sure that you have used a large enough pot. The addition of that much sugar will raise the liquid level a bit.
Then get ‘er boilin’. You want to raise the temp of the mixture up to 220F. And it takes longer than Alton tells you it does. That may have been because I just wasn't vigorous enough in my use of heat.
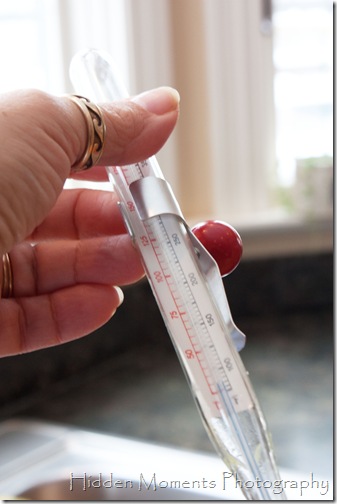
Remember to use your thermometer. Alton also tells you to stick a plate in the freezer to test the readiness of your marmalade. I skipped that step and just boiled until the back of the spoon coated well and it dripped off the spoon just right. It was at a full, rolling boil that couldn’t be stirred down and was producing a lot of foam so I knew I was at the right place, marmalade wise.
I hate cooking rules.
Once the marmalade is done cooking you ladle it into hot canning jars, put on the lids and process in a boiling water bath for 10 minutes at full boil. Any opened marmalade can be refrigerated.
Once the canning is done, take them out of the water and let them cool on the counter. And do not open them for 24 hours. Let them sit. Let them rest. Have some discipline here people!
But if you just can’t wait to taste the nectar then scrape out the last dregs of the marmalade from the pot.
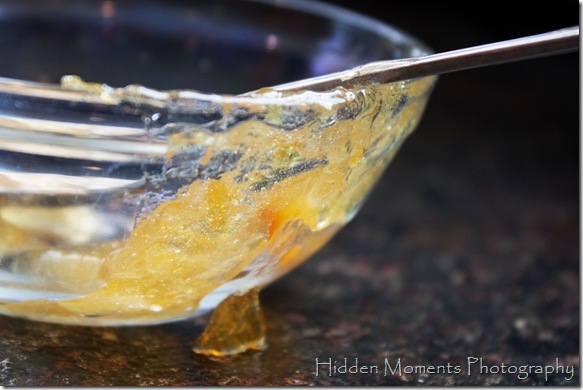
Oh be still my beating heart. I wish you all had “smellovision”.

A little dollop of sunshine on a very blizzardy day (I cannot see the street at the moment).
That means that oranges are expensive. And if you buy them you want them to taste all good and yummy. Not sour and unpleasant. So I was mighty upset when the oranges that I purchased several weeks ago where not, shall we say, all that tasty. HHBL was unimpressed.
Well darn it! Now I have 8 oranges that are going to sit in the refrigerator until they finally go rotten and have to be fished out, all dripping and slimy, and thrown in the compost pile.
Not so fast young Padwan. There is something that you can do with oranges.
You can make Orange Marmalade.
Oh just the thought brings joy and sunshine.
Lets see how we do this shall we? I will tell you right off the bat that I used Alton Brown’s Orange Marmalade recipe. No need to reinvent the wheel on this.

These are all the things that you are going to need. Don’t you love recipes that don’t require a vast assortment of ingredients and tools.

Oh oranges why must you look so lovely on the outside and yet be so disappointing.
The first thing that you are going to need to do is thoroughly wash and dry the fruit. I didn’t think that a picture of that step was required.
Then get out your mandoline and start slicing.

Or in this case, abandon the mandoline that refused to slice accurately and just get out a nice sharp knife. The slices should be 1/8 of an inch thick. Or so. Hey, uniformity is so boring!

Good thing they were on the sour side cuz I would just have munched away on these babies.
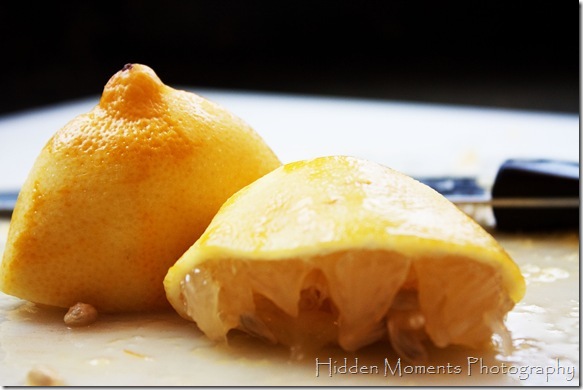
Then you need to zest and juice one lemon and throw that into the pot along with the orange slices.

A lemon has given it’s life and juice for my pleasure.
Sorry.

Add the oranges slices, the lemon zest and juice and 6 cups of water to the pot and turn the heat UP so that the liquid gets to a boil. Then turn the heat down a bit to keep the mix at a vigorous simmer and let it go for about 40 minutes, stirring every 10 minutes or so.
Take a break. Look out the window.

This is what it was doing the day that I made the marmalade. See, I really needed some sort of sunshine and happiness.

Stir the pot. Watch the Pileated Woodpecker. Stir the pot. Watch the Pileated Woodpecker.
And finally, after 40 minutes the oranges are all nice and soft and mushy. And that is when you add the sugar…….3 POUNDS plus 12 ounces of sugar.
I didn’t take a picture of that. I think you can figure out how to do that. But I will tell you that you need to make sure that you have used a large enough pot. The addition of that much sugar will raise the liquid level a bit.
Then get ‘er boilin’. You want to raise the temp of the mixture up to 220F. And it takes longer than Alton tells you it does. That may have been because I just wasn't vigorous enough in my use of heat.

Remember to use your thermometer. Alton also tells you to stick a plate in the freezer to test the readiness of your marmalade. I skipped that step and just boiled until the back of the spoon coated well and it dripped off the spoon just right. It was at a full, rolling boil that couldn’t be stirred down and was producing a lot of foam so I knew I was at the right place, marmalade wise.
I hate cooking rules.
Once the marmalade is done cooking you ladle it into hot canning jars, put on the lids and process in a boiling water bath for 10 minutes at full boil. Any opened marmalade can be refrigerated.
Once the canning is done, take them out of the water and let them cool on the counter. And do not open them for 24 hours. Let them sit. Let them rest. Have some discipline here people!
But if you just can’t wait to taste the nectar then scrape out the last dregs of the marmalade from the pot.

Oh be still my beating heart. I wish you all had “smellovision”.

A little dollop of sunshine on a very blizzardy day (I cannot see the street at the moment).
Tuesday, November 1, 2011
Do Not Mess With The Recipe
We all have them. Recipes handed down from mother to daughter. From grandmother to grandson. From grandmother to granddaughter.
They live on tattered 3x5 cards in our recipe files. In fact, we know them so well that we no longer need to pull the card out. We can make the recipe in our sleep.
That is how I feel about the oil pie crust recipe that has been in my family for many a year. I have no idea where it originally came from. Mimi might know. All I know is that Grandma Pringle used it. Mimi uses it. I use it.
It never fails.
Never.
Unless………
Let me tell you the tale of Deb and the Pie Crust. Or, how I lost my religion making a stupid pie.
Lets go way back. Way, way back. OK, this last Saturday morning if you really have to know. HHBL and I were going to have dinner with some old friends.
Hi Linda and Bob!! We had a GREAT time on Saturday.
Now back to our story.
I was in charge of dessert. I had already talked to Bob and ascertained that French Silk Pie would not be turned away. You never know, some people don’t like chocolate. I KNOW!! How can that be??? So I checked and got the OK. I could have made the pie with a graham cracker crust but I don’t really like it that way. I like it with a traditional pie crust. It is already so sweet that a graham cracker crust just seems like over kill.
And I was already trying to kill all of us with a stick and a half of butter and 4 raw eggs in the pie. Yes raw eggs. Deal with it.
That morning I had already found that I was out of unsweetened chocolate so I had to run out to Wally Mart. I came home, assembled all of the items that I would need to make the pie crust….
And realized that I wasn’t going to have enough milk to make the pie crust AND have milk for breakfast on Sunday. And the pie crust recipe only uses 1/4 cup of milk so that tells you how little milk we had.
Darn it! I don’t have time to run back out to Wally Mart. What to do. What to do. So I rooted around in the frig and came up with heavy cream. I always have some of that around here. We are a family that believes that the words “Low fat, No fat” are baaaaaaaaaad.
Heck, I bet I can use the heavy cream instead of the milk in the pie crust. It won’t make any difference.
Famous last words.
I roll out the crust in the same manner that I always do. Mimi and I roll the crust out between pieces of plastic wrap. Works like a charm. And makes it very easy to detach the crust from the wrap and then move over to the pie plate. The crust looks good. Rolls out as usual. Except when I go to move it over to the pie plate the round rips right in half.
What the HECK!
There is an old thought that says if the pie is for you to eat the crust will roll out perfectly. But if the pie is for company then you will have trouble. Whoever said this must have been looking over my shoulder.
Grrrrrrrrrr. So I gather everything back up and re-roll. And when I go to move it to the pie plate………it rips apart again. And not only down the middle but it just sort of falls apart into pieces. Lots of pieces.
OH FOR THE LOVE OF PETER, PAUL and MARY!
At this time the dog very quietly went into his house as he felt it was safer to be there.

I was very frightened Alpha Male. You were yelling. I don’t like yelling.
I again gather everything up. Mutter wild imprecations at the atmosphere. And I re-roll for the third time. Even when I was learning to make pie crust this has never happened. Never.
Do you want to guess what happened when I rolled the crust out for the third time.
Well first I said my favorite curse phrase. I cannot write it here as this is a family blog. HHBL came and gently inquired what was wrong and if he could help.
I replied in the negative as I was

Violently pitching the crust into the garbage. Can you see all the little pieces of dough. There was no way that I could piece the crust together without it looking like something from Dr. Frankenstein’s lab.
And then I stood there for a time and raised my fist in defiance and said,
As God is my witness, I will not be bested by pie dough!!!
What had I done wrong? Why wasn’t this working? And then it hit me. When I had used the heavy cream I had made the pie crust too “short”. There was too much fat in the cream as opposed to the 1% milk that I usually use. Could it possibly be that simple?
Yes, it could. I bit the bullet and used a portion of the very small amount of milk that we had in the frig to make a new batch of pie crust.
And it rolled out perfectly. And the pie was delicious.
The moral of the story my friends.
If it has always worked…..Don’t mess with the recipe.
Thursday, October 13, 2011
International Bundles of Joy
Fillo dough. I love fillo dough.
Pot stickers. I love pot stickers.
And this recipe combines both in a symphony of international goodness and joy.
I will tell you right off the bat that I forgot to take a picture of the ingredients needed for this recipe. But if you go to the bottom and click on the link provided then you will get the entire recipe so you won’t need a picture.
But, the first thing that you will need is ground pork. And for some reason my local grocery store didn’t have any ground pork. They ALWAYS have ground pork, until I really needed it. What is a girl to do when the grocery store doesn’t have any ground pork and she needs to make a recipe?


Moving on.


And yes I realize that there is a hair on the ginger. I realized that it was there just after I took the picture. The ginger had, at one point, flown out of my hand and landed on the floor. AFTER I had already sliced off what I needed. I have a dog remember. I took care of it.
Then you spend time chopping up one spring onion and 1/2 cup of water chestnuts and then add them to the pork. I forgot to take a picture of that process so you will just have to imagine it or better yet do it.
And if you are REALLY lazy (like me) instead of taking the time to finely chop all those things you just run everything back through the grinder. Well it was already dirty so why not!


Then there is some salt and sugar and sesame oil to be added. Didn’t take pictures of that either. When you are all done mixing everything up, put some plastic wrap over the bowl and refrigerate the pork for an hour or so.
When your pork mixture is nice and chilled you need to take your fillo dough out, lay it out on the counter and QUICKLY cover it with plastic wrap AND a damp towel. This stuff dries out so fast. And once it is dried out there is no working with it.

Melt some butter. Everything is made better with the addition of butter. Do not use margarine. For this recipe it has too much water content. It has to be butter.

Take one sheet of fillo dough, lay it out and quickly brush the entire surface with melted butter. Repeat with a second layer and a third layer. Then when you lay down a fourth sheet of fillo dough DO NOT slather it with butter. Just leave it dry. When this is done then cut the fillo stack into 8 equal squares. At first I used my pizza cutter but I really think that a big and sharp knife does a better job.

Put a dollop (1/2 teaspoon) full of pork mixture on each square. Then working one square at a time brush water on all the edges of the square and then draw up all the edges to form a sort of bundle.

They should look like this. Or perhaps something a bit more artful. This is the best I have ever been able to come up with.
Then pop them into the oven. While they are baking you can whip up the Ginger Dipping Sauce that goes with the recipe.
After 20 long and anxiety filled minutes………

Try not to eat all of them in one sitting.
Click on the link below to get the recipe.
Tuesday, September 13, 2011
Are These Peppers Hot?
What is it about days where there is a multitude of sunshine that just guarantees that I get a boat load done?
Today has been one of those days that is for sure. I was going to tell you the story about Me and Archibald Rogers but that will just have to wait for another day. Maybe tomorrow.
So far today I have
- baked 4 loaves of bread.
- done 5 loads of laundry
- roasted, picked and frozen 2 chickens.
- started a big pot of chicken stock.
- blanched and frozen green beans.
- blanched, peeled, chopped and frozen a bunch of tomatoes.
- vacuumed.
- pickled peppers.
That last one was what I actually wanted to show you before I go into the family room and die. Or have a glass of wine first and then die. I haven’t decided yet.
Last night at knitting KnitWit Rosie was talking about the large amount of Banana Peppers that her aunt had brought over for her.
Banana Peppers? I have had the hankering lately to pickle some banana peppers.
And so this morning KnitWit Rosie arrived at my doorstep with some lovely peppers, both of the Banana variety and of the OH MY GOSH THESE ARE HOT variety. We will get to those in a minute.
So I ran right over to the old computer and fired up the internet and found a recipe for Sweet Banana Peppers that looked like it might work. I knew that I didn’t want to process these, that I was just going to put them in a big jar, pour the brine over them and then stick them in the frig so it was not as big a deal as all the usual canning.

Ummmmmmmmm, don’t those look yummy. Loads of mustard seed and celery seed. When the brine was boiling it smell just like my Grandma Pringle’s kitchen in the summer. I momentarily went looking for the Cheez Its that she always had.
Sniff, no Cheez Its.
But there will be Sweet Pickled Banana Peppers once these sit in the frig for a couple of weeks. I am thinking they are going to be very good on hamburgers.

My mouth is watering. Aren’t you glad that you are there and not here? It isn’t a pretty sight.

And of course I had to use my favorite canning jar cap. I have officially cleaned Wally Mart out of their stock of these things. They are only stocked this time of year and I have more than once kicked myself for not buying more of them when they were available.
It hurts to kick myself for things as well as being rather difficult and not very graceful.
But I digress.
And since, after I had poured the brine over the sliced Banana peppers I had a boat load of extra brine I figured that I would just pour some over the other peppers that KnitWit Rosie brought over.
Cue music from Psycho
WeepWeepWeepWeepWeepWeepWeep
Now I was acquainted with one of the peppers that I dug out of the plastic bag. They are those little red chili peppers that pack some heat. But the other ones I wasn’t aware of. She thought they were called Black Pearl Peppers. Evidently they are USUALLY considered ornamental because they are 1. not that flavorful and 2. HOTHOTHOTHOT. KnitWit Rosie’s husband, DJ Dan, demonstrated that the other day when he decided to taste one. Nothing for the first 30 seconds and then agonized calls for milk.

Perfect. They should be really something after sitting in the pickling brine for a bit.

And I have just a bit of brine left. Now what should I use it one.
The mind boggles.
Thursday, March 10, 2011
Oh Goody
Guess what???
It is raining!
And pretty soon it will be snowing!!! The weather men/women here in the Frozen Northeast Ohio are kindly telling us that we are going to get 4 inches of snow tonight with another 8 inches possible tomorrow.
That would add up to a foot of snow.
To add to the 110 inches of snow that we have already had this year.
Sigh.
And so it seemed like a day when I should do something that I hadn’t ever done before. OK, I did clean and do some laundry and we all know that there is always some of that going on around here.
No, I decided that I should make pita breads.
And they are absolutely awesome.
I wish you could see them. Well you could if I would get up off my bahookie and take a picture of them but…..I am too lazy to do that at the moment. So you will have to wait until I do another batch of them and take pictures of the process. Let me tell you, once you have made these you will never buy them again. They are totally and completely better than the dried out ones that you get in a package at the store. And I bet that you didn’t even know that the ones that you can buy really aren’t what they should be like.
I certainly didn’t until I bought a package of freshly baked pita breads from a little store in a small town in Israel. And when I opened the package, took out a pita and ate it the angels sang and my eyes were opened.
And I don’t think that it had anything to do with the fact that we were visiting the Holy Land at the time. The pitas were just that good.
And the other awesome thing about this recipe was that the whole process took about an hour and 15 minutes from start to finish. Now that is my kind of yeast bread recipe.
Oh fine, fine. Here is a picture of the luscious little pillows of goodness. Tonight for dinner I am going to top them with some hummus, sliced tomato, chicken and tzatziki sauce. With a lovely glass of chardonnay. 
And now I am off to do something else that I have never done before. At least not on purpose.
I am going to felt something in my washing machine.
Wish me luck.
Thursday, February 10, 2011
Mother May I!
This will be short, very sweet and to the point.
I have been baking today.
Oh. Momma.
Can you hear the angels singing?
Normally I don’t bake or cook recipes from the newspaper. They don’t generally have things that interest me for some reason. But yesterday, yesterday there was a recipe. It spoke to me. It said,
Debbie you must make me. Your life will be unfulfilled until you do.
I usually try to listen to those kinds of voices.
What did I make?
Chocolate Moon Pies with Marshmallow Creame Filling.
Oh. My. Word.

It will be so worth it I promise.
Now I must leave you because….

And we won’t even talk about the fact that my coffee mug has an advertisement on it for a drug to treat yeast infections.
I am the daughter of a doctor after all.
Thursday, February 3, 2011
Eggs + 3 Minutes = Perfection
I take breakfast seriously. I think about it. I cogitate on it. I plan it.
One might think that I look forward to it.
I do, oh I do.
HHBL and I don’t eat breakfast together. It isn’t because we don’t like each other and want to make googly eyes at each other over the table. We do.
Can you hear my progeny retching after that last sentence?
But I digress.
We don’t eat breakfast together because we eat it at different times. I get up before he does and I eat before he does. He is responsible for getting his own breakfast and I for mine.
I generally have oatmeal or Malt o Meal or Cream of Wheat or Cocoa Wheats.
But occasionally I have……..
Eggs.
To be specific, I have soft-boiled eggs.
I can hear the angels singing in appreciation of soft boiled eggs.
Who knew that the application of hot water and 3 short minutes could produce something so yummy.

No more than three minutes mind you or you will have hard boiled eggs. Hard boiled eggs have their uses in the pantheon of eggs. Picnics, Easter, deviled eggs. But not for breakfast. At least not here at Chez Knit.

Please ignore the fact that my timer doesn’t seem to have bathed for a long time. I forget to remind him and just like a child he doesn’t do it on his own. Sigh. Life is hard here.
And also please turn your head away from the fact that my counter seems to be rather on the dirty side as well. And we won’t even TALK about all the dust that I can see on the furniture since the sun is actually out and shining today.
I have more important things to do than dust.
I need to blog.

Fear not!

After three minutes the timer dings and I spring into action. Take the pan off the burner. Run the eggs swiftly under some cold running water to stop cooking action.

Ow, ow, ow, ow!
The shell, it is hot.
Scoop out the lovely, gently cooked egg with a spoon into the dish. At this point you must be extra careful that you do not also scoop out some of the shell. It is really a disappointment when you are relishing your soft boiled egg and you bite down on something crunchy that shouldn’t be there. Then, after you have the eggs in the dish you roughly chop them up with the spoon and give them a good stir to evenly distribute the butter as well as the salt and pepper.

Yes, you would be right on that. The only thing that you cannot plan for when soft boiling eggs is the occasional…..
Bad Egg.
They all look the same from the outside. It is only when you crack that sucker open after cooking that you realize there might be a problem. And if you could have seen the second egg you wouldn’t have wanted to eat it either. One look at the color of the white, which wasn’t white AT ALL, and it was into the garbage with that one. I often get my eggs from a local “supplier” and that occasionally happens.
That is also why I always crack eggs into a separate bowl when baking. You cannot take out a bad egg once it has been added. I learned that the hard way.

Subscribe to:
Posts (Atom)